
Windows Server
Putting Windows Server on a dedicated server from the client area, then connecting to it over Remote Desktop.
Windows Server installs from the client area, the same way as a Linux system: through the reinstall form on the service page. Count on a longer wait than a Linux image, and on a different way in once it is up, Remote Desktop rather than SSH.
Careful
Installing wipes every drive on the machine, data disks and arrays included. There is no undo and we keep no copy. Take your backups off the server first.
Pick the image
Open the client area, then Services, then your server. The reinstall form shows the systems available as a grid of tiles. The Windows tile carries a version list.
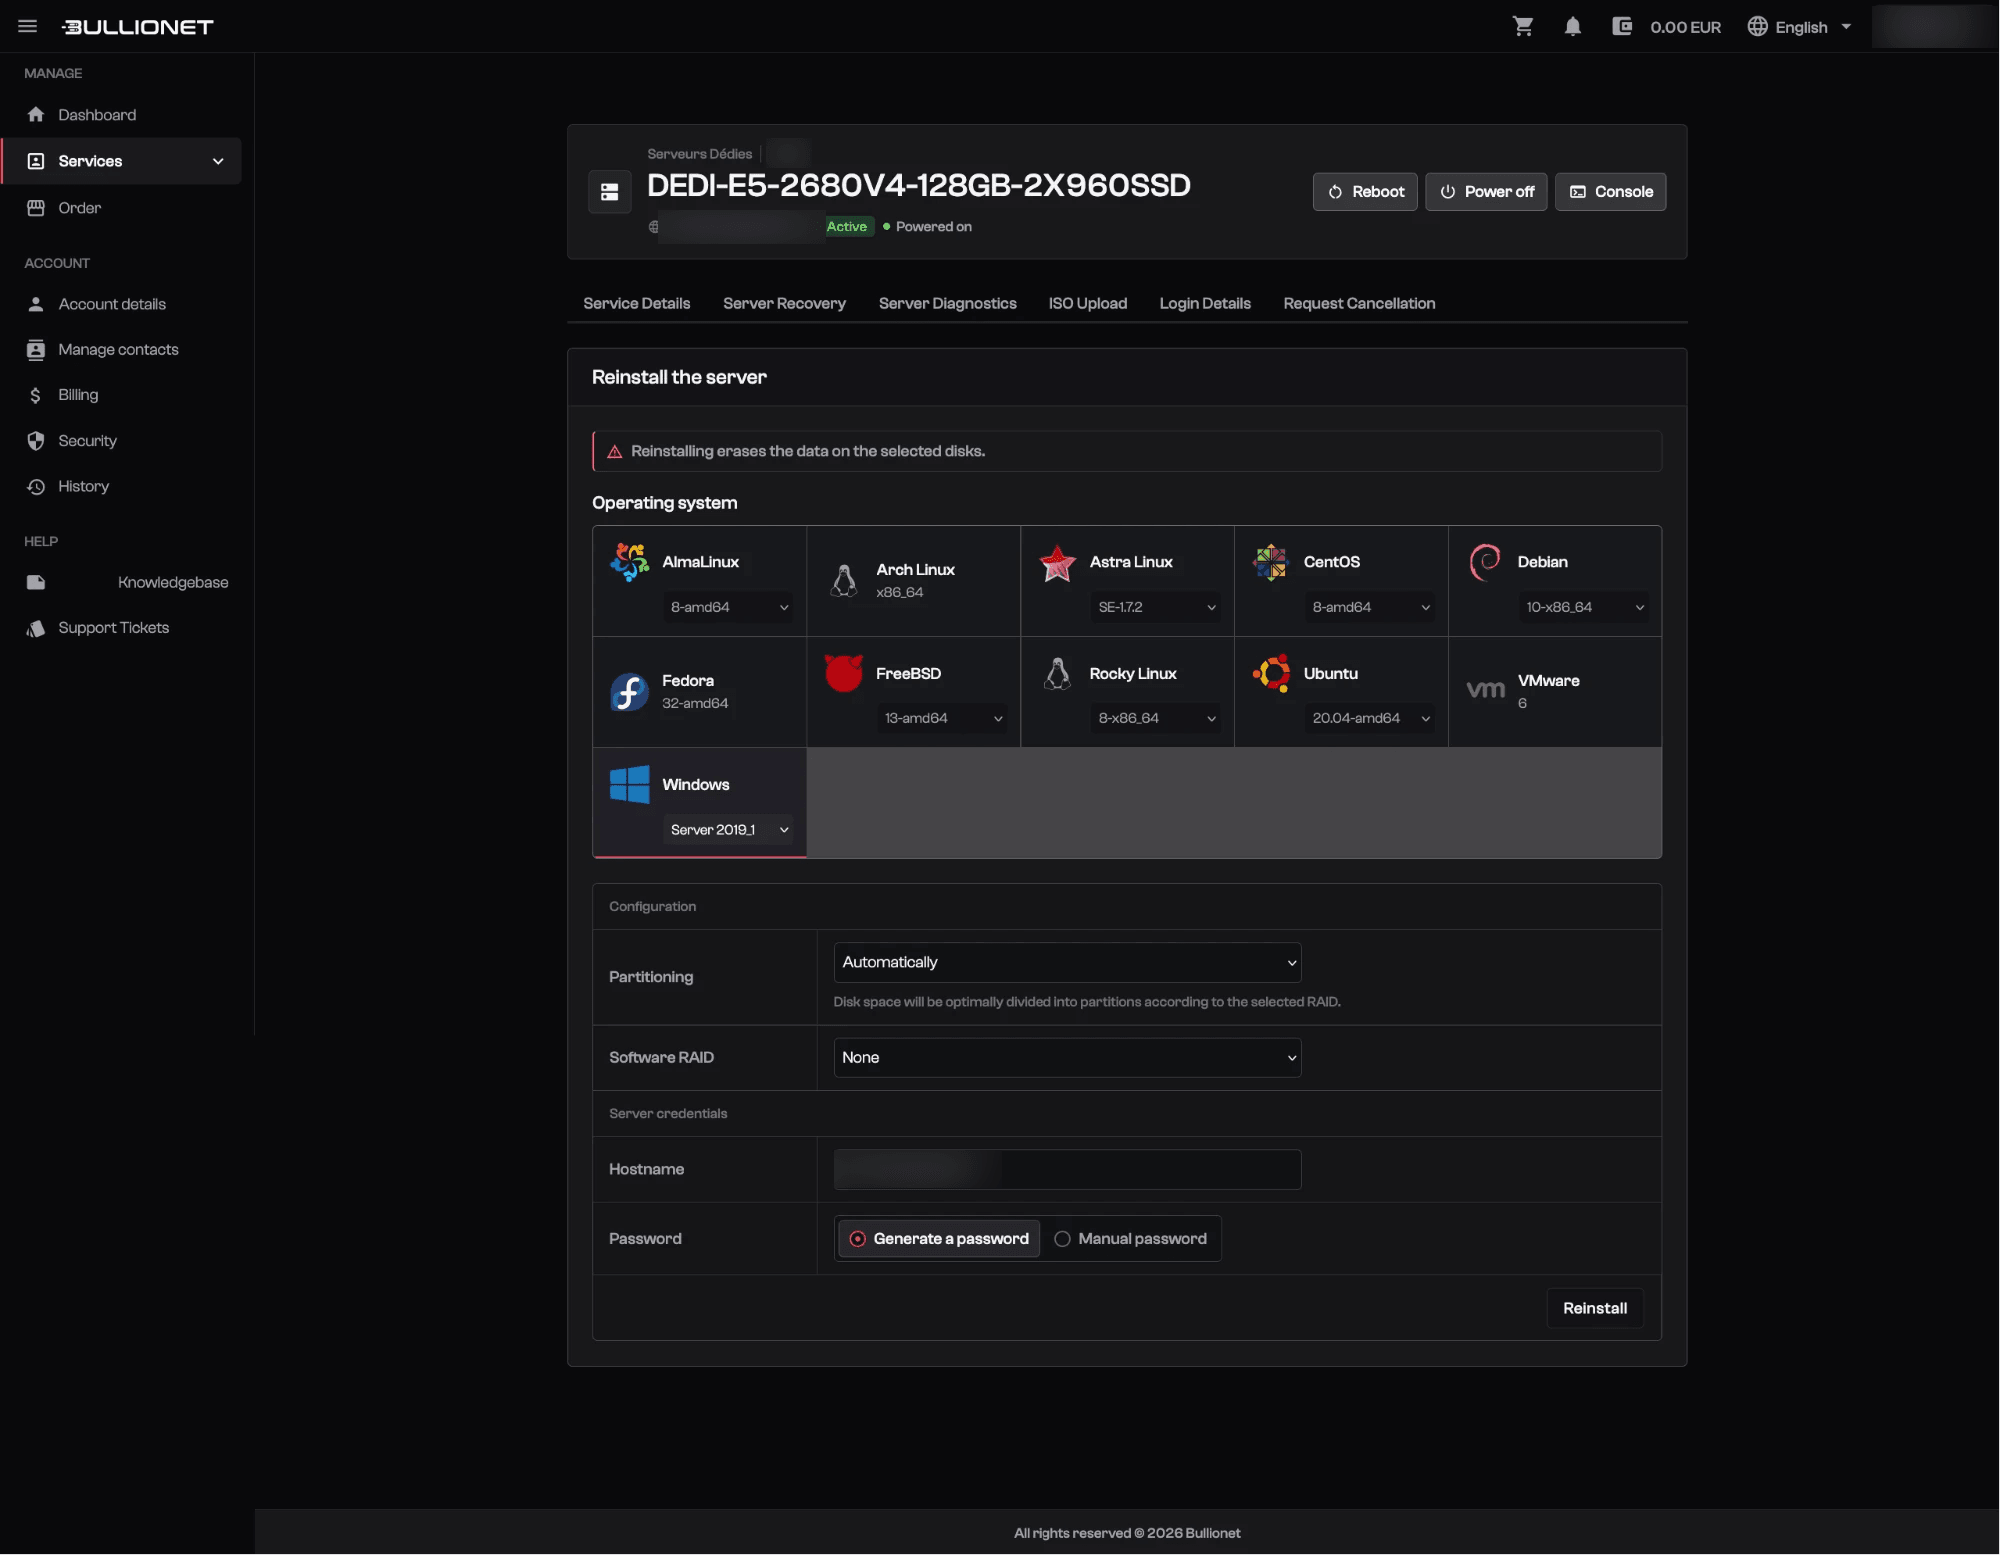
Windows Server 2019 is the version we recommend. It is the one our hardware is tested against, its drivers are in place, and it is what we support best. Ask for another version by ticket if your application requires it.
Licensing questions, on the licence attached to your server or on bringing your own, go through a ticket: they are handled per service.
Fill in the form
| Field | What to put |
|---|---|
| Partitioning | Automatically unless you have a reason. Disk space is then divided according to the RAID you pick |
| Software RAID | None for a single volume, or the level you want across the drives |
| Hostname | The name the machine carries, for instance win-01.example.com |
| Password | Generate a password produces a strong one and shows it to you, Manual password lets you set your own |
Then confirm. The machine restarts into the installer and works on its own.
Follow it on the console if you want to watch: it is the only place where the installer is visible. Nothing to do there, the install is unattended.
Connect over Remote Desktop
Once the install finishes, Windows answers on port 3389 at the server's primary IP address. The user is Administrator and the password is the one from the form.
| Your machine | What to use |
|---|---|
| Windows | Remote Desktop Connection, or mstsc /v:203.0.113.10 |
| macOS | Windows App from the App Store, previously Microsoft Remote Desktop |
| Linux | xfreerdp /v:203.0.113.10 /u:Administrator, or Remmina |
The first connection warns that the certificate is not verified, which is expected on a fresh install: the server signed it itself.
First things to do
- Change the password, even a generated one, and store it somewhere other than your inbox.
- Restrict Remote Desktop to your own address. In Windows Defender Firewall, open the inbound rule for Remote Desktop and scope it to your IP under Scope. Port 3389 left open to the internet is scanned within the hour and attacked with stolen passwords.
- Run Windows Update to the end, restarts included. The image is as old as the image, not as old as today.
- Set the time zone and the keyboard layout, which start on US defaults.
Good to know
Better than restricting the port: do not expose it at all. A VPN on the server, or an SSH tunnel from a second machine, keeps Remote Desktop reachable only from where you are.
When it does not work
| Symptom | Where to look |
|---|---|
| Remote Desktop refuses the connection | The install may still be finishing. Check the machine's screen on the console |
| The password is refused | The user is Administrator, not admin. Retype the password rather than pasting: the console layout may have changed characters |
| Connected, then a black screen | Wait, the first session builds the profile. If it lasts, restart the session from the console |
| Nothing answers on 3389 | The Windows firewall blocks it, or Remote Desktop is not enabled. Both are fixed from the console |
Going back to Linux
The same form, another tile. Reinstalling your OS covers the Linux path and what to do after a fresh image.
Reviewed on September 14, 2026